
Building the Foundation of Your Home Lab
Creating a home lab is an exciting journey for any technology enthusiast or professional. It allows you to experiment with enterprise software and hardware in a controlled environment.
One of the most critical yet often overlooked components is the networking backbone. A well organized cabling system ensures that your lab remains manageable as it grows over time.
At the heart of this organization lies the patch panel. This device serves as a static termination point for all your permanent network runs.
Learning how to choose patch panel for home lab environments will save you hours of frustration. It transforms a messy pile of cables into a professional grade installation.
In this guide, we will explore the various technical specifications you must consider. We will also discuss the physical attributes that define a high quality panel.
Understanding the Role of a Patch Panel
A patch panel is essentially a bridge between your networking equipment and your wall jacks. It acts as a central hub where all incoming cables are terminated.
Using a panel prevents wear and tear on your expensive network switches. You only move short patch cables rather than pulling on long runs hidden in your walls.
This setup also makes troubleshooting much easier for the home labber. You can quickly isolate specific lines or reroute internal network traffic with ease.
Without this component, your rack can quickly become a chaotic web of wires. This phenomenon is often referred to as a spaghetti mess by industry professionals.
Efficiency in Documentation
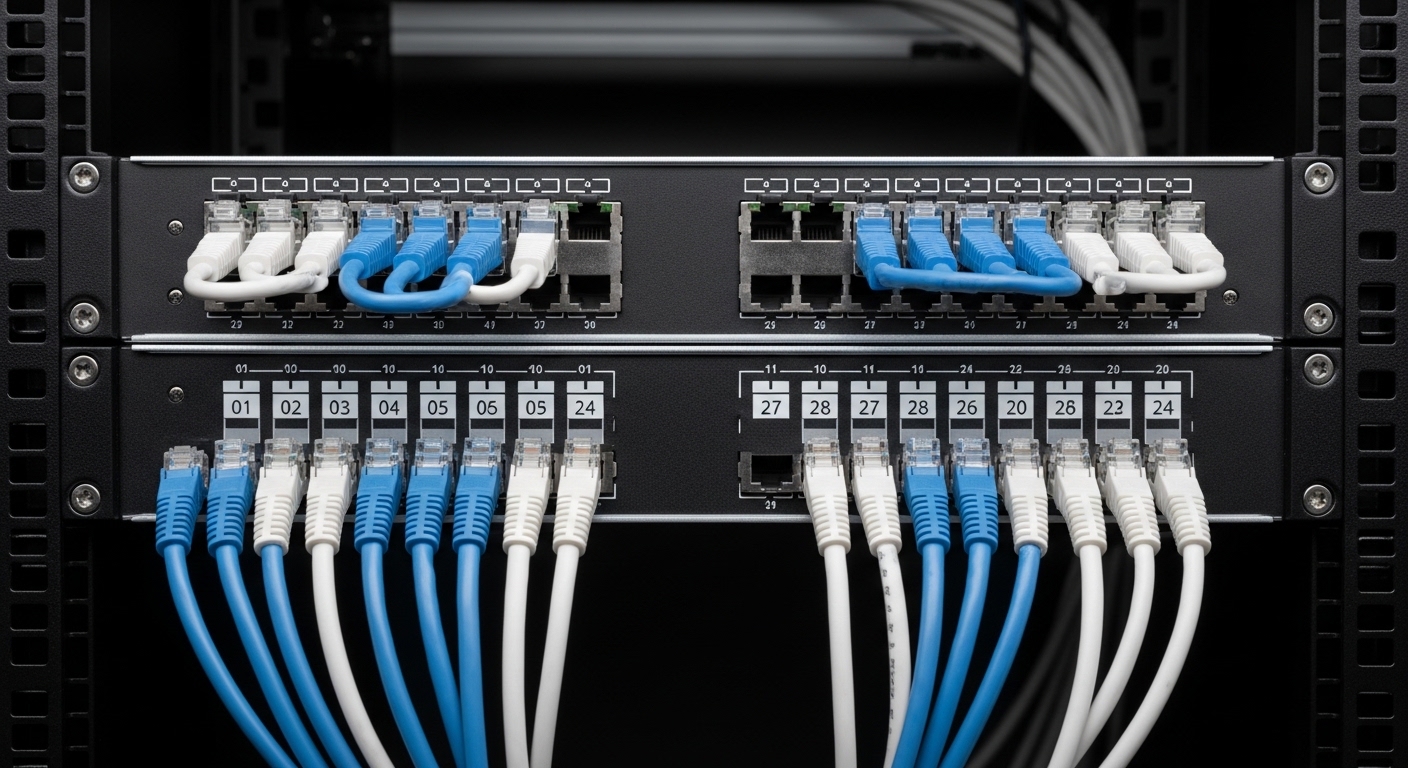
Labeling is a core benefit of using a patch panel. Most units feature dedicated spaces to write or stick labels for each port.
This allows you to know exactly which port leads to your living room or your secondary server. Clear visual identification systems are essential for complex home setups.
How to Choose Patch Panel for Home Lab Port Density
The first decision you will face is the number of ports required. Common configurations include 12, 24, and 48 port versions.
For most home labs, a 24 port panel is the ideal starting point. It provides enough capacity for several servers, access points, and desktop connections.
If you have a smaller wall mounted rack, a 12 port panel might suffice. These are often half width or compact form factor units designed for tight spaces.
Always plan for future expansion when selecting your port count. It is much easier to leave empty ports now than to install a second panel later.
By 2026, many homes will have even more connected devices requiring hardwired stability. Choosing a 48 port panel can be a smart long term investment for power users.
Space Utilization and Rack Units
Patch panels are typically measured in Rack Units or U. A standard 24 port panel usually occupies 1U of vertical space.
High density panels can fit 48 ports into a single 1U space. However, these can be difficult to manage because the cable spacing is tight.
Keystone vs Punch Down Panels
This is perhaps the most debated topic in the home lab community. Both styles have their unique advantages and specific use cases.
A traditional punch down panel features fixed blocks on the back. You use a specialized punch tool to seat each individual wire into the metal teeth.
These are generally more affordable and provide a very secure connection. They are the standard in commercial buildings where cables rarely move once installed.
However, they require more skill and patience to terminate correctly. If one port fails, you often have to work in a cramped rear space to fix it.
The Flexibility of Keystone Panels
Keystone panels are essentially empty frames with holes. You snap individual keystone jacks into these slots to customize your layout.
This design is incredibly popular for home labs because of its modularity. You can mix and match different connector types like RJ45, fiber, or HDMI.
If a single jack breaks, you simply pop it out and replace it. There is no need to disturb the other connections on the panel.
Keystone panels also allow you to terminate the cable comfortably in your hand. You then snap the jack into the frame once the work is done.
Comparing Performance Standards
Your choice of patch panel must match the category of your cabling. Using a Cat5e panel with Cat6a cables will create a performance bottleneck.
Cat6 is the current gold standard for home lab environments. It supports 10Gbps speeds over short distances which is plenty for residential use.
If you want the absolute best performance, look for Cat6a certified panels. These are designed to handle higher frequency signals with minimal crosstalk.
Ensure that the internal circuitry of the panel is rated for the speed you desire. A cheap, unrated panel can introduce significant packet loss into your network.
The Importance of Gold Plating
Check the specifications for the thickness of the gold plating on the contacts. Higher quality panels use 50 micron gold plating for superior conductivity and durability.
Thinner plating can wear off over time with repeated plugging and unplugging. This leads to corrosion and signal degradation in humid environments.
Shielded vs Unshielded Options
Most home environments use Unshielded Twisted Pair or UTP. This is easier to work with and sufficient for standard networking tasks.
However, if your rack is located near high voltage power lines, you might consider shielding. Shielded panels help block electromagnetic interference from external sources.
Using a shielded panel requires Shielded Twisted Pair or STP cabling. You must also ensure the panel is properly grounded to the rack frame.
For most users, the extra cost and complexity of shielding are unnecessary. Only choose this path if you are running cables alongside heavy machinery or power mains.
Physical Build Quality and Materials
A patch panel should be sturdy enough to withstand the tension of many cables. Look for frames made of heavy duty cold rolled steel.
Flimsy plastic frames can bend or crack under pressure. This is especially true if you use heavy gauge cables like Cat6a.
The finish of the metal should be powder coated to prevent rust. A smooth black finish is the most common choice for modern server racks.
Check the quality of the mounting ears as well. They should be integrated into the frame rather than separate pieces for maximum strength.
The Benefit of Cable Management Bars
Some panels include a metal bar that extends from the back. This is known as a rear cable support bar or lacing bar.
It provides a place to zip tie your cables as they enter the panel. This relieves the strain on the actual termination points.
Form Factors and Mounting Variations
While the 19 inch rackmount panel is standard, other options exist. If you do not have a rack, consider a wall mount bracket.
These brackets allow you to mount a standard panel vertically against a flat surface. This is perfect for closet based labs or small apartments.
There are also desktop patch panels that sit on a shelf. These are excellent for beginners who are just starting with a single switch and a server.
Vertical patch panels are another alternative for tight spaces. They take up very little width but require significant vertical clearance.
Hinged Wall Mount Brackets
If you choose a wall mount setup, look for a hinged bracket. This allows you to swing the panel out to access the rear wiring.
It makes maintenance much easier without having to unmount the entire unit. This is a huge time saver for frequent lab changes.
Aesthetics and Customization
The look of your lab is often a point of pride for many enthusiasts. Some panels come with built in shutters for the ports.
These shutters keep dust out of unused jacks. They also provide a cleaner look for the front of your server rack.
Color coding is another way to enhance the utility of your panel. You can use different colored jacks for various network segments.
For example, use blue for your main LAN and red for your security cameras. This visual mapping strategy helps you identify connections at a glance.
Power over Ethernet Considerations
If you plan to power access points or cameras, check for PoE compatibility. Most modern patch panels handle standard PoE voltages without any issues.
However, high power applications like PoE++ require better heat dissipation. Look for panels that specify support for higher wattage standards.
Poor quality connectors can heat up when carrying significant current. This can damage the insulation of your ethernet cables over time.
Always ensure your patch cables are also rated for the same power delivery. Consistency across the entire signal path is vital for safety.
Budgeting for Your Patch Panel
Patch panels range from very cheap to quite expensive. A basic punch down panel is usually the most budget friendly choice.
Keystone frames are inexpensive, but the cost of the individual jacks adds up quickly. However, the ease of installation often justifies the higher price tag.
Do not buy the cheapest possible unbranded panel from a random marketplace. These often have poor manufacturing tolerances which lead to loose connections.
Investing an extra twenty dollars can get you a professional grade component. This piece of critical infrastructure hardware will last for many years.
Hidden Costs to Remember
Remember to budget for the tools required for your chosen panel. A punch down panel requires a good impact tool with a sharp blade.
A keystone setup might require a wire stripper and a crimping tool if you are making your own ends. These ancillary tool costs should be factored into your total lab budget.
Evaluating Port Alignment
Some panels have ports arranged in a single long row. Others split them into two rows of 12 or groups of 6.
Grouped ports can be easier to label because there is more white space available between the sections. This helps in organizing different subnets or VLANs physically.
Check if the ports are angled or flat. Angled panels direct the cables toward the sides of the rack.
This can reduce the need for horizontal cable management units. It creates a streamlined cable path that looks very professional.
Pros and Cons Summary
Choosing a punch down panel offers a reliable and permanent solution for your lab. It is the most cost effective way to terminate many lines.
The downside is the difficulty of making changes or repairs. It requires a steady hand and specific tools to complete the task.
A keystone panel offers unmatched versatility and ease of use. It allows for a modular approach that can evolve with your technology needs.
The main drawback is the higher total cost of ownership. You also need to ensure jack compatibility with the specific frame you buy.
Conclusion and Final Advice
Selecting the right hardware is a fundamental part of the home lab experience. Understanding how to choose patch panel for home lab setups ensures long term success.
Focus on your current needs while leaving a clear path for future growth. A 24 port keystone patch panel is usually the best balance for most users.
Prioritize build quality and standard compliance over the absolute lowest price. Your network stability depends on these physical connections remaining solid.
Once your panel is installed, take the time to label every single port. Your future self will thank you deeply during the next network upgrade.
Enjoy the process of building your dream lab. A clean and organized rack system is a true mark of a dedicated tech expert.