

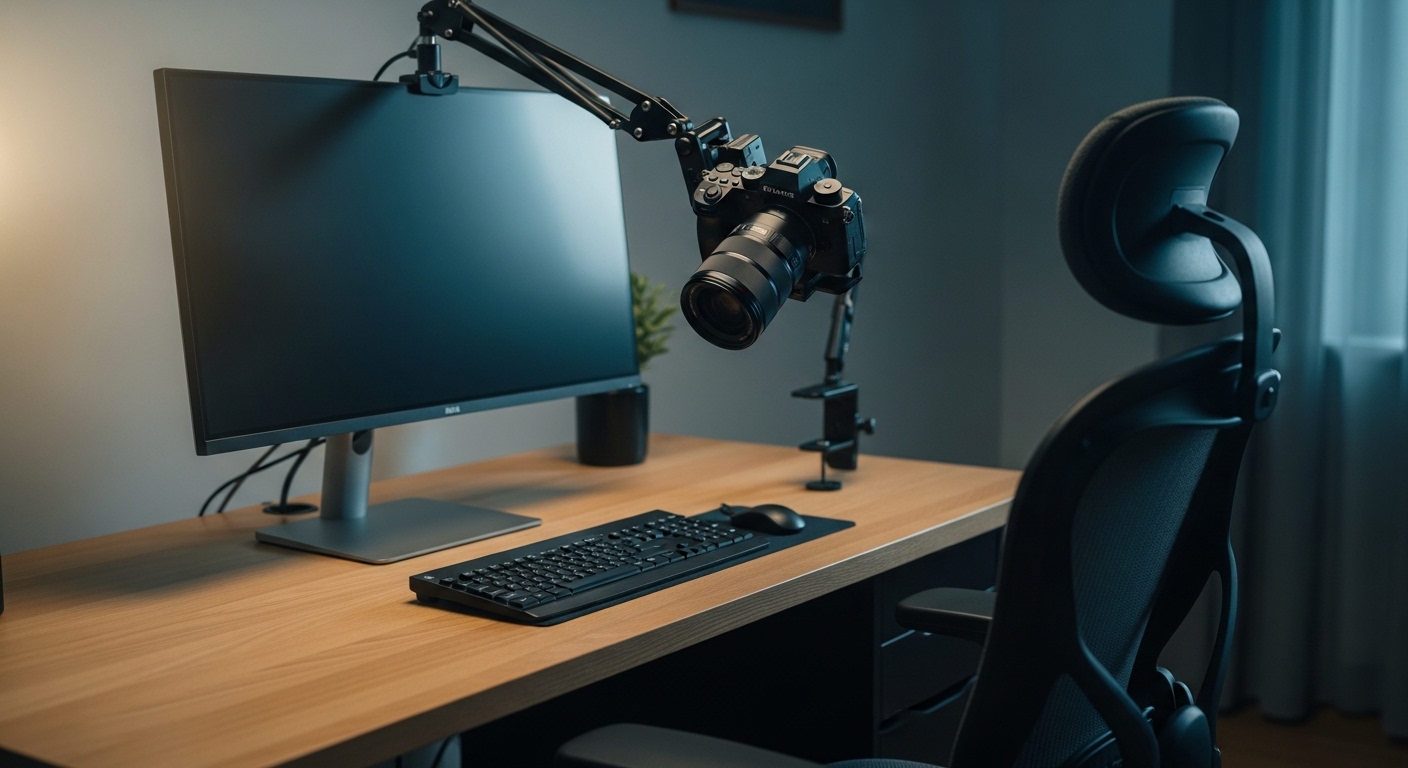
The home office has evolved from a temporary workspace into a professional hub where high stakes decisions are made daily. In this environment, your digital appearance functions as your virtual suit, conveying competence and authority.
Standard webcams often deliver muddy video, poor color reproduction, and terrible exposure. Fortunately, you can dramatically elevate your presentation by learning how to use a mirrorless camera as webcam for all your professional meetings.
The Mirrorless Advantage over Standard Webcams
Standard webcams are physically limited by their miniature chassis designs. They use tiny image sensors that are similar in size to those found in older mobile phones.
These small sensors struggle to capture sufficient light, resulting in noisy and grainy video streams. A mirrorless camera changes the game completely by utilizing a much larger sensor to capture stunning visual detail.
This hardware difference allows the camera to process more light data. As a result, you get a clean, sharp image with rich colors and excellent contrast.
The difference is immediately noticeable to clients and colleagues alike. Your video feed will stand out for its exceptional clarity and professional broadcast look.
Understanding Sensor Size and Visual Depth
Mirrorless cameras come with various sensor sizes, including micro four thirds, APS C, and full frame options. Each of these sensors is vastly larger than any webcam sensor on the market.
A larger sensor allows for a shallower depth of field. This optic physical property is what creates that beautiful background blur that everyone desires.
Digital blur filters used by video conferencing software often look artificial and glitched. They can accidentally erase your ears, hair, or hands during movement.
A mirrorless camera creates a natural blur because of physical optics. Your face remains tack sharp while the background gently falls out of focus.
The Lens Factor in Professional Video
Your camera lens plays an equally vital role in creating a professional virtual appearance. Unlike fixed webcam lenses, mirrorless systems allow you to swap optics to suit your specific space.
For a desk setup, you want a lens that can handle close distances while providing a flattering perspective. A prime lens with a wide maximum aperture is generally the best choice for this task.
Aperture is represented by an f number, such as f/1.4 or f/1.8. The lower this number, the more light the lens can pass to the camera sensor.
Lenses with wide apertures also enhance the shallow depth of field effect. They help you maintain a bright, clean image even when your home office lighting is less than perfect.
Essential Hardware Checklist for the Perfect Setup
Transitioning your camera into a full time workstation accessory requires some specific gear. Having these components ready will make the installation process seamless and reliable.
The Hardware Requirements
- A compatible mirrorless camera with clean video output capabilities
- A high quality prime or zoom lens suitable for desk distances
- A robust connection cable, which is usually a micro HDMI or USB cable
- A reliable mounting solution to keep your camera stable
- A continuous power adapter to prevent battery drainage issues
Each of these components plays a crucial role in maintaining system stability. Skipping any of them can lead to frustrating dropouts during your video calls.
Let us look closely at how to configure these individual pieces of hardware for maximum reliability.
Solving the Constant Power Challenge
Standard lithium ion batteries are built for intermittent shooting, not continuous live streaming. If you rely on standard batteries, your camera will likely turn off within forty minutes.
To solve this, you must bypass the standard battery system entirely. The most reliable solution is to use a dummy battery accessory designed for your camera model.
This accessory is a hollow plastic shell shaped like your camera battery. It features a power cord that runs out of the battery compartment to a wall outlet adapter.
The dummy battery tricks your camera into thinking it has a full, non depleting power source. This allows you to run your camera for hours on end without any risk of shutdown.
The Importance of Clean HDMI Output
Before purchasing capture hardware, you must verify that your camera supports clean video output. This feature is vital for a professional look.
Clean output means the camera sends only the pure video image through its HDMI port. It strips away all the on screen overlay data that you normally see on the back screen.
If your camera lacks this feature, your video feed will display exposure values, battery levels, and focus grids. Your meeting participants will see these distracting menus overlaid on your face.
Most modern mirrorless cameras offer an option in their settings to disable this display info. Consult your camera user manual to locate this menu option and turn it off.
Method One Utilizing USB Webcam Software
Many camera manufacturer brands have developed desktop applications that simplify the connection process. This software method is highly accessible and cost effective.
The Software Setup Process
To begin, visit the official website of your camera manufacturer and download their webcam utility. Install this software on your computer and restart your system to ensure proper driver integration.
Next, connect your camera to your computer using a compatible USB cable. Turn on your camera and set the mode dial to movie or automatic.
Open your video call software and navigate to the video settings menu. Select the brand name webcam utility driver from the list of available cameras.
Your computer will now display the live feed from your camera. This method is incredibly simple and requires no external capture hardware.
Evaluating the USB Software Method
While this approach is highly convenient, it does come with some notable performance tradeoffs. The video signal is compressed over USB, which can limit the maximum resolution.
Often, these utility programs cap the output at 720p resolution or thirty frames per second. The image, while still better than a cheap webcam, may lack ultimate crispness and detail.
Additionally, running these virtual driver utilities can consume significant computer processing power. This extra load can cause older laptops to run hot and activate loud cooling fans.
Method Two Using a Hardware Capture Card
If you demand the absolute best image quality, a hardware capture card is the premier solution. This method treats your camera as a true video input source.
Why Capture Cards Excel
A capture card is a dedicated piece of hardware that converts an HDMI signal into a standard USB video class format. This conversion happens inside the capture card itself, saving valuable computer processing power.
The result is an uncompressed, high resolution video feed with virtually zero latency. You can easily achieve full 1080p high definition or even spectacular 4K resolution.
The motion will look incredibly smooth because the card easily handles sixty frames per second. This is the setup used by professional broadcasters and top tier content creators.
Hardware Installation Steps
Start by connecting your dummy battery to your camera and plugging it into the wall. Next, connect an appropriate HDMI cable to your camera output port.
Plug the opposite end of this cable into the input port of your external capture card. Connect the USB cable from the capture card into a fast USB port on your PC.
Turn your camera on and switch it to manual video mode. Open your video application and select the capture card as your video device.
You will instantly see a crystal clear, high definition feed of your workspace. The visual quality will be unmatched by any software utility.
Optimizing Camera Settings for Video Calls
Plugging your camera in is only the first step to achieving a professional broadcast. You must also adjust your camera internal settings to ensure consistent image quality.
The Exposure Triangle for Webcams
Avoid leaving your camera on fully automatic exposure. Automatic modes will cause the brightness to shift constantly as you move, which looks highly distracting.
Set your camera to manual exposure mode so you can control every variable. Start by setting your lens aperture to its lowest possible f number for maximum light.
Next, set your shutter speed according to the double shutter rule. If your video is set to thirty frames per second, set your shutter speed to one sixtieth of a second.
Finally, adjust your ISO setting to achieve the perfect brightness. Keep the ISO as low as possible to avoid introducing digital noise into your video.
Focus and Color Calibration
Configure your focus mode to continuous autofocus with face or eye tracking enabled. This setting ensures the camera keeps you in sharp focus even if you lean back or move around.
For white balance, avoid using automatic white balance. Auto modes can cause the color temperature to swing wildly if you wear different colored clothing.
Instead, choose a manual white balance preset that matches your desk lighting. This lock ensures your skin tones remain healthy and consistent throughout your meetings.
Perfecting Your Home Office Lighting
Even the most advanced camera sensor requires adequate light to produce a clean image. Proper lighting is what separates amateur setups from professional studios.
Implementing Key and Fill Lighting
Your main light source, or key light, should be placed slightly to one side of your face at a forty five degree angle. This positioning creates flattering highlights and subtle shadows that define your facial structure.
Using a large, diffused light source will prevent harsh shadows under your nose and eyes. You can use a dedicated softbox or place your desk near a large window.
To soften the shadows on the opposite side of your face, introduce a weaker fill light source. This can be a smaller LED panel or even a white board that reflects light.
The combination of key and fill lighting creates a balanced, professional look. It makes you look polished and ready for any high level business presentation.
Adding Background Separation
To prevent yourself from blending into a dark office background, you should add background lighting. Place a warm practical lamp or an LED light strip behind your desk chair.
This subtle glow illuminates your background and creates beautiful contrast. It highlights your silhouette and adds incredible depth to your shot.
A well lit background also makes the physical blur of your lens look even more spectacular. Your workspace will look like a professional television studio.
Audio Integration and Sync Solutions
Great video is only half of the professional equation. If your audio is poor, your entire presentation will feel cheap and unpolished.
The Problem of Audio Sync Lag
When you use a hardware capture card, the high definition video processing can introduce a minor delay. This delay means your video might lag slightly behind your audio track.
If you use a USB microphone connected directly to your computer, your lips may not sync with your voice. This lag is highly distracting for viewers during long discussions.
To resolve this issue, you should route your microphone signal directly into your camera microphone input. The camera will merge the audio and video into a single synchronized stream.
When this combined stream reaches your computer, the audio and video will be perfectly matched. Your voice and lip movements will remain in perfect harmony.
Choosing the Right Microphone Route
If your camera lacks an audio input jack, you must sync your audio within your computer software. Many virtual mixer programs allow you to add an audio delay to match the video lag.
Experiment with adding small millisecond delays to your microphone channel until the sync looks perfect. This attention to detail demonstrates a high level of professionalism.
Mounting and Ergonomic Camera Placement
How you position your mirrorless camera affects how your audience connects with you. An improper angle can make the meeting feel awkward or uncomfortable.
Choosing the Right Desk Mount
A large tripod behind your desk can be cumbersome and block your movement. Instead, opt for an adjustable desk arm that clamps directly to your desktop.
These desk mounts allow you to suspend the camera right above your monitor. They hold the camera in a stable position without taking up valuable workspace floor area.
Ensure the mounting arm is rated to support the weight of your specific mirrorless camera and lens. A heavy camera setup requires a robust, high quality metal clamp.
Finding the Ideal Eye Level Angle
Adjust your camera height so that the lens sits directly at eye level. Looking down at a camera or looking up at a high screen feels unnatural for viewers.
An eye level camera angle mimics the natural perspective of a face to face meeting. It fosters a stronger sense of connection and engagement with your audience.
Frame your shot so that you occupy the center of the frame with a tiny amount of space above your head. This balanced framing is clean, professional, and visually appealing.
Maintenance and Heat Prevention Tips
Using a camera designed for photography as a continuous webcam puts unique demands on the hardware. Following a few maintenance rules will extend the lifespan of your gear.
Managing Thermal Limits
Mirrorless cameras generate significant heat when processing high resolution video feeds for hours. To prevent thermal shutoff, open the camera battery door and pull out the LCD screen.
Moving the screen away from the camera body allows heat to escape from the rear casing. Adjust your camera power settings to ensure the thermal shutdown limit is set to high.
If your room is exceptionally warm, you can position a small, quiet desk fan to blow air across the back of the camera. This gentle airflow keeps the internal processing chips cool.
Optics and Sensor Care
Dust particles on your lens elements will create soft, dark smudges in your video feed. Use a high quality optical cleaning kit to dust your lens front glass regularly.
Avoid touching the glass with your fingers, as skin oils can degrade the lens coatings. Keep a lens cap on your camera when your workstation is not in use.
If you swap lenses often, use a hand blower to clear dust from your sensor. A clean camera system ensures impeccable visual performance every single day.
Frequently Asked Questions
Can any mirrorless camera be used as a webcam?
Most mirrorless cameras released in the last several years can function as webcams. You must verify that your specific model supports either manufacturer software or clean HDMI output.
Will continuous webcam use damage my camera sensor?
No, continuous live streaming will not damage your camera sensor under normal conditions. Modern image sensors are designed to withstand prolonged video processing and thermal exposure.
Is a dummy battery absolutely necessary?
Yes, a dummy battery is highly recommended for any professional home office setup. A dummy battery provides reliable continuous wall power for uninterrupted meetings.
Why is my webcam video feed laggy?
Lag can occur if your computer processor is overloaded or if you are using a slow USB port. Ensure your capture card is plugged into a high speed USB port on your motherboard.
Conclusion
Investing the time to set up your mirrorless camera as a webcam is one of the best home office upgrades you can make. The unparalleled image clarity, natural background blur, and excellent low light performance will immediately set you apart.
By choosing the right mounting hardware, dummy power solutions, and lighting arrangements, you create a broadcast quality presentation. Take charge of your digital presence and present your best self in every professional meeting.