

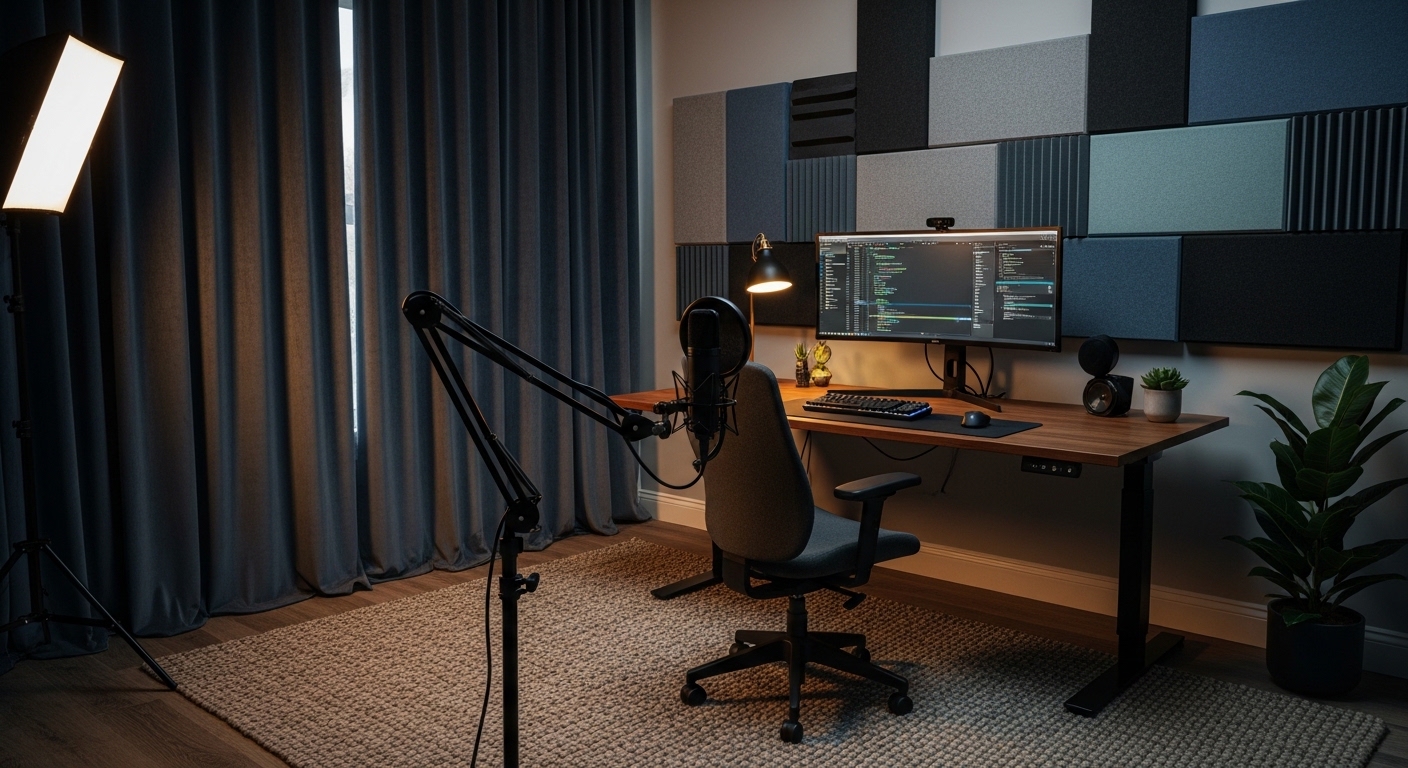
The Importance of Sound Quality in Professional Environments
Most remote workers spend significant time focusing on their webcam resolution or lighting setup. However, audio quality often has a much larger impact on how colleagues and clients perceive your professional presence.
Poor sound can lead to listener fatigue and misunderstandings during critical meetings. Learning how to improve home office video call acoustics is essential for anyone working from home in the modern era.
A room with poor acoustics typically suffers from excessive echo and background noise. These issues make it difficult for microphones to isolate your voice clearly.
When you address these acoustic challenges, you create a more comfortable environment for communication. This guide provides a comprehensive look at transforming your workspace into an audio sanctuary.
Understanding the Physics of Sound Reflections
Sound travels in waves that bounce off every hard surface in your room. When these waves hit a flat wall, they reflect back and create what we call reverberation or echo.
In a small home office, these reflections happen so quickly that they blur the start and end of your words. This phenomenon is known as temporal masking and it reduces speech intelligibility.
Hard surfaces such as glass windows, wooden desks, and drywall are the primary culprits. These materials do not absorb energy but rather send it right back into the room.
To fix this, you must introduce materials that can trap or scatter these waves. This process is the foundation of acoustic treatment in any professional studio or office.
The Problem with Parallel Surfaces
Parallel walls are particularly troublesome because they cause sound to bounce back and forth repeatedly. This creates a metallic ringing sound known as a flutter echo which is very distracting.
You can test for this by clapping your hands loudly in the center of your room. If you hear a zing or a ringing tail after the clap, your room needs treatment.
Strategic Furniture Placement for Better Audio
You do not always need specialized equipment to begin your acoustic journey. The way you arrange your existing office furniture can significantly impact sound quality.
Large objects like bookshelves filled with books act as natural diffusers. They break up flat surfaces and scatter sound waves in different directions.
Avoid placing your desk directly in the center of the room. This location is often where standing waves are most prominent and can cause audio dead zones or booms.
Positioning your desk slightly off center helps break the symmetry of the room. This simple change can reduce the intensity of reflected sound hitting your microphone.
If possible, face a wall that has some texture or decoration rather than a bare surface. Soft items like a fabric sofa or a plush armchair can also absorb significant amounts of low frequency energy.
Addressing Floor and Ceiling Reflections
The floor and ceiling are often the largest untreated surfaces in a home office. Hardwood, tile, or laminate floors reflect sound directly up towards your desk and microphone setup effortlessly.
Adding a thick area rug with a dense pad underneath is one of the most effective upgrades. This covers a large surface area and prevents downward reflections from bouncing back up.
The ceiling is equally important but much harder to treat with standard furniture. Professional studios often use acoustic clouds which are panels suspended from the ceiling.
For a home office, you can achieve similar results by using lightweight foam tiles or hanging fabric. Reducing the vertical bounce of your voice will make your audio sound much more intimate and clear.
The Impact of Window Treatments
Windows are essentially acoustic mirrors because glass is extremely dense and reflective. If your desk faces a window, your voice will bounce off the glass and distort your signal immediately.
Using heavy blackout curtains or specialized acoustic drapes can solve this problem. These thick fabrics absorb high frequencies and prevent them from reflecting back into the room.
Installing Acoustic Panels for Targeted Absorption
Once you have handled the large surfaces, it is time for targeted treatment. Acoustic panels are designed to absorb sound energy and convert it into trace amounts of heat.
You should place these panels at the primary reflection points in your room. These are the spots on the walls where sound travels directly from your mouth to the wall and then to the mic.
A simple trick to find these points is using the mirror method with a partner. Have them slide a mirror along the wall until you can see your microphone reflection from your seated position.
Mark these spots and install panels there first for the best results. High quality panels made from mineral wool or fiberglass are much more effective than thin packing foam.
Dealing with Low Frequency Build Up
Low frequencies or bass sounds tend to gather in the corners of a room. This can make your voice sound muddy or boomy during professional video calls with clients.
Bass traps are thicker acoustic treatments designed specifically for corners. They help balance the room by soaking up the excessive bass energy that standard thin panels cannot reach.
Microphone Selection and Proximity Techniques
The hardware you use is only half the battle when learning how to improve home office video call acoustics. How you position that hardware is the most critical factor in the final result.
A common mistake is placing the microphone too far away from the mouth. This forces the device to pick up more of the room ambiance and less of your direct voice.
Try to keep your microphone within four to six inches of your face. This allows you to lower the input gain which naturally reduces the amount of background noise captured.
Using a boom arm helps you achieve this perfect positioning without cluttering your desk. It also decouples the microphone from desk vibrations like typing or mouse movements.
Software Solutions for Real Time Audio Enhancement
In addition to physical treatments, modern software offers powerful tools for audio cleanup. Many video conferencing platforms have noise suppression features built into their settings menu.
These algorithms are trained to identify and remove consistent background sounds. This includes the hum of a computer fan or the whirring of an air conditioning unit.
You should also pay attention to your gain staging within your operating system. Ensure your microphone level is high enough to be clear but not so high that it causes clipping or distortion.
Third party applications can provide even more granular control over your sound profile. You can apply digital equalization to remove harsh frequencies or add warmth to your voice.
The Role of Echo Cancellation
Acoustic echo cancellation is a vital technology that prevents your speakers from feeding back into your microphone. If this fails, other participants will hear delayed echoes of their own voices.
Using headphones is the easiest way to eliminate this problem entirely. By removing external speakers from the equation, you break the feedback loop and ensure crystal clear communication.
Managing External Noise Contamination
Acoustic treatment improves how you sound inside the room, but soundproofing keeps the outside world out. Traffic, barking dogs, and family members can all disrupt your concentration.
Check for air gaps around your office door as sound travels through air very efficiently. Installing a door sweep or weather stripping can significantly reduce the amount of noise that leaks in.
If your walls are thin, you might consider adding mass to them. Heavy bookcases or even mass loaded vinyl hidden behind decor can help block external sounds from entering.
Double pane windows also provide a substantial barrier against street noise. Keeping your workspace quiet allows the acoustic treatments to do their job much more effectively.
Advanced Tips for a Studio Grade Setup
For those who want the absolute best results, consider the concept of diffusion. Diffusion does not remove sound but scatters it to create a sense of space without the echo.
Using a mix of absorption and diffusion prevents the room from sounding too dead or unnatural. A room that is overly treated can feel claustrophobic and make your voice sound thin.
The goal is a balanced environment where your voice sounds natural and clear. This balance is what distinguishes a professional lab from a makeshift home office in 2026.
Regularly test your audio by recording short clips of yourself speaking. Listen back with high quality headphones to identify subtle issues like sibilance or plosive pops.
The Importance of Pop Filters
Plosives are the harsh bursts of air caused by words starting with letters like P or B. These bursts can overload the microphone capsule and cause a loud thumping sound.
A simple pop filter placed between you and the mic will disperse this air. This is a low cost upgrade that immediately improves the perceived quality of your audio stream.
Acoustic Considerations for Standing Desks
If you use a standing desk, your acoustic environment changes as you move. The reflection angles from the floor and walls shift when you transition from sitting to standing.
Ensure your acoustic panels are tall enough to cover both heights. You may also need a longer boom arm to maintain consistent microphone proximity in both positions.
Adding a thick anti fatigue mat can serve a dual purpose. It provides comfort for your feet while also absorbing floor reflections beneath your standing workstation.
Consistency is key for maintaining a professional image throughout the day. Your audio profile should remain stable regardless of your physical posture or desk height.
Summary of Actionable Acoustic Steps
- Identify hard surfaces that cause immediate reflections.
- Add soft materials like rugs and curtains to absorb high frequencies.
- Install acoustic panels at primary reflection points on the walls.
- Use corner bass traps to prevent muddy or boomy sound.
- Place the microphone close to your mouth to improve signal ratios.
- Use headphones to eliminate feedback loops and speaker echo.
- Seal door gaps to block external noise from entering the office.
Frequently Asked Questions
Do egg cartons really work for soundproofing?
No, egg cartons are too thin and porous to provide any real benefit. They may slightly scatter high frequencies, but they do not absorb or block significant sound energy.
Is acoustic foam the same as soundproofing?
No, these are two different concepts often confused by many users. Acoustic foam is for improving internal sound, while soundproofing requires heavy materials to block external noise.
Can software replace physical acoustic treatment?
Software can help reduce background noise, but it cannot fix heavy room echo. Physical treatment is always the most effective way to ensure high quality audio capture.
Where is the most important place to put a panel?
The wall directly behind your monitor is usually the most critical spot. This area catches the direct sound of your voice as you speak toward the computer screen.
Conclusion
Taking the time to understand how to improve home office video call acoustics is a worthy investment. It enhances your professional image and makes your daily interactions much more productive.
By combining physical treatments like panels and rugs with proper microphone technique, you can achieve studio quality results. Start with the simplest changes and build your setup over time.
A quiet and well treated room allows you to focus on your message rather than your technical difficulties. Your audience will appreciate the clarity and warmth of your voice in every meeting.