
The Evolution of the Home Lab
Home laboratories have grown from simple hobbies into powerful testing environments. As you add more servers, smart devices, and virtual machines, your network architecture must evolve to keep everything safe and organized.
Many enthusiasts start with a single flat network where every device talks to every other device. However, this approach exposes your critical data to potential security vulnerabilities from smart home hardware or unstable lab experiments.
To solve this issue, you must learn how to segment home lab network with VLANs properly. This educational guide will walk you through the entire process from planning to final implementation.
Why a Flat Network is a Security Risk
A flat network means all your devices share the same broadcast domain. In this environment, your personal banking laptop sits right next to your untrusted smart television.
If a malicious actor compromises a vulnerable smart device, they can easily scan your entire home network. They can find open ports on your main file server or attempt brute force attacks on your private backup systems.
Furthermore, accidental damage is highly common in testing environments. A single misconfigured network service in your lab could disrupt internet connectivity for your entire household.
By keeping everything on one subnet, you allow unrestricted lateral movement for potential threats. Isolation is the only reliable way to protect your most sensitive data.
What Exactly is a VLAN
A Virtual Local Area Network is a technology that partitions a single physical network switch into multiple logical networks. It operates at Layer 2 of the Open Systems Interconnection model.
Without this technology, you would need to purchase separate physical switches for every group of devices you want to isolate. By using logical separation, you save space and power while gaining immense flexibility.
Each logical network behaves as if it were a completely separate physical switch. Devices in one group cannot communicate with devices in another group unless you explicitly allow it through a router.
This logical separation is achieved by adding a small tag to the ethernet frames. This tag tells the network hardware which virtual group the traffic belongs to.
The Core Benefits of Network Segmentation
The primary reason to isolate your networks is security. If an experimental virtual machine gets compromised, the threat cannot spread to your personal laptop or banking devices.
Another massive benefit is improved traffic control throughout your home. Broadcast traffic from smart televisions and streaming sticks stays confined to its own zone instead of flooding your lab servers.
Finally, organization becomes much easier. You can easily identify where a device belongs simply by looking at its assigned network zone.
This structure also makes troubleshooting network issues much simpler. You can isolate problems to a single logical network without affecting other household users.
Essential Hardware for VLAN Implementation
To start this project, you need some specific gear. A standard consumer router provided by your internet provider usually will not support these advanced features.
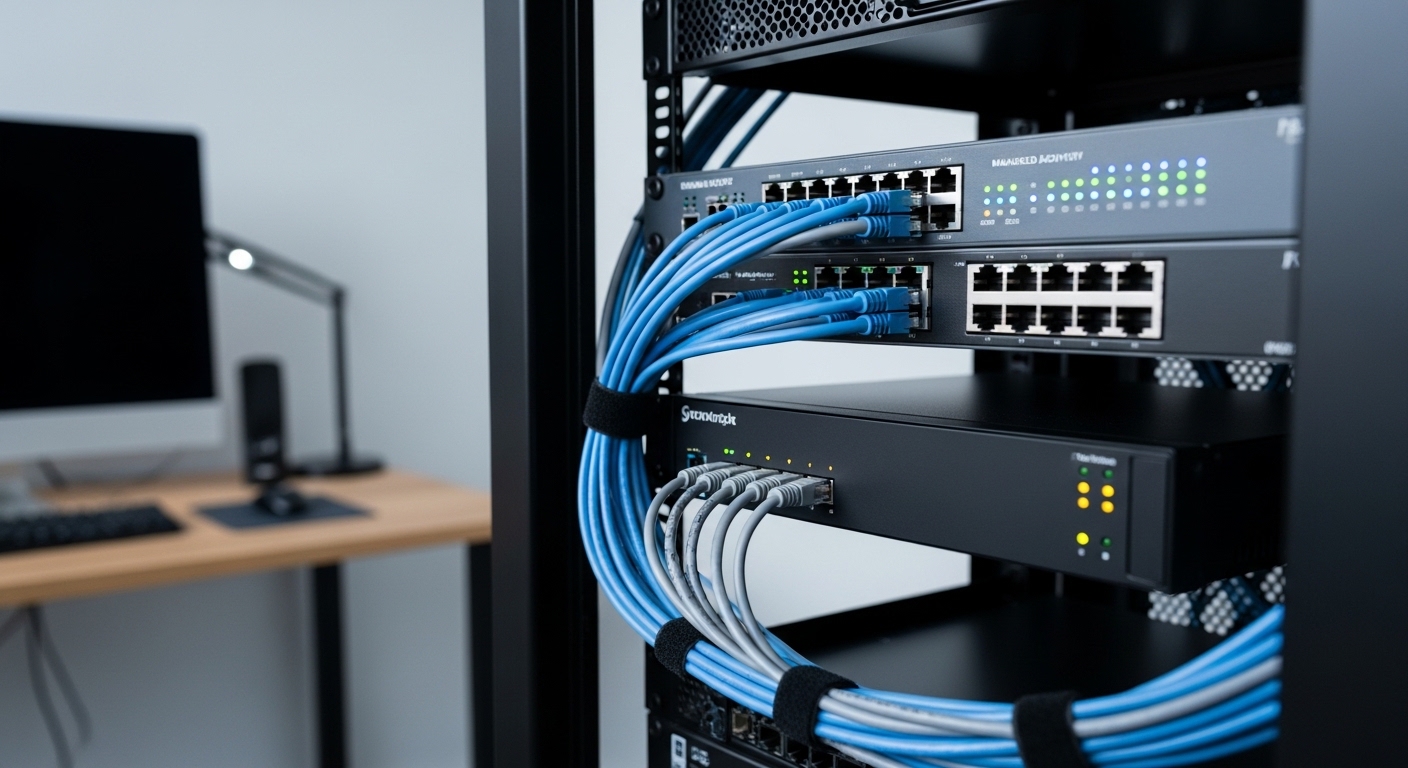
You will need a fully managed network switch that supports the 802.1Q standard. This standard allows the switch to apply digital tags to network traffic.
Unmanaged switches are not suitable for this task because they ignore network tags. They will either drop the tagged packets or broadcast them to all ports, which breaks your isolation.
You should also ensure your network cabling is in good condition. Standard copper ethernet cables are perfectly fine as long as they support your required speeds.
The Role of a VLAN Aware Router
While switches handle traffic within a single virtual network, you need a router to pass traffic between different networks. This router must be capable of processing tagged packets.
A VLAN aware router acts as the gateway for each of your isolated zones. It inspects the packets and determines if they are allowed to cross into another network.
This router is also where you will configure your firewall policies. These policies act as virtual security guards that control flow between your zones.
Without a compatible router, your isolated networks would remain completely silent and unable to access the internet. The router bridges the gap while maintaining strict security boundaries.
Distinguishing Access Ports and Trunk Ports
Understanding port types is crucial before configuring your managed switch. Ports are typically configured as either access ports or trunk ports.
An access port connects to a single end device like a desktop computer or a network printer. This port belongs to one specific VLAN and only sends untagged traffic to the connected device.
A trunk port connects two network devices like a switch and a router. This port carries traffic for multiple virtual networks simultaneously by preserving the digital tags on each packet.
You must configure trunk ports on any links that carry traffic from multiple zones. This includes the links between your switches and your router.
Designing a Scalable Virtual Network Plan
Before touching any software configuration, you must plan your logical layout on paper. Let us design a highly functional layout that fits a standard testing environment.
This planning stage prevents configuration mistakes later. It also ensures you allocate enough room for future expansion as your lab grows.
You can assign specific numbers to represent each zone. These numbers are called VLAN IDs and can range from 1 to 4094.
It is best to avoid using VLAN 1 for your actual devices. This is the default native network on most hardware and can present minor security risks if left unconfigured.
Choosing Your VLAN Identification Numbers
Let us define a practical numbering scheme for your home environment. Using structured numbers makes it easy to remember which network is which.
- VLAN 10 is the management zone for switches and physical servers
- VLAN 20 serves as the main trusted network for your personal devices
- VLAN 30 isolates all smart home and internet of things gadgets
- VLAN 40 acts as the dedicated testing area for experimental virtual machines
- VLAN 50 provides limited internet access to guests without local network exposure
This structured approach ensures that you never mix trusted and untrusted traffic. It also makes configuring your firewall policies much more intuitive.
You can match your IP subnet numbers to your network IDs to keep things tidy. For example, VLAN 10 can use the IP range starting with 192.168.10.0.
Step by Step Switch Configuration
Now you can log into the management interface of your switch. Locate the configuration page to begin adding your planned IDs.
Create each network ID individually and assign a descriptive name. For example, assign the name Management to ID 10 and IoT to ID 30.
Once created, you must assign ports to these networks. Assign the port connected to your lab server to ID 40 as an untagged access port.
The port connecting your switch to your firewall must be configured as a tagged trunk port. This ensures the firewall receives the packets with their tags intact.
Tagged versus Untagged Traffic Explained
The concepts of tagged and untagged traffic can be confusing at first. Let us break down how the switch handles these packets.
An untagged packet is normal network traffic generated by your devices. When this packet enters an access port, the switch assigns it to the VLAN designated for that port.
A tagged packet already contains a virtual identifier inside its header. This tag is read by the switch to ensure the packet is routed to the correct destination.
When the switch sends a packet out of an access port to an end device, it removes the tag completely. The end device remains completely unaware of the virtual architecture.
Creating Virtual Interfaces on Your Router
Your router must know how to route traffic for each of these virtual networks. In many professional setups, this is achieved by creating subinterfaces.
A subinterface is a virtual interface created on top of a single physical network port. You will create one subinterface for each VLAN ID you configured on your switch.
Each virtual interface must be assigned a unique gateway address. For example, VLAN 10 might use the gateway address 192.168.10.1.
These virtual gateways allow the router to receive packets from each zone. The router can then decide whether to forward them or drop them based on your rules.
Configuring DHCP Services per Virtual Network
To make your network user friendly, you should enable automated address assignment. You must configure a separate address pool for each virtual interface.
This ensures that a device plugged into an IoT port automatically receives an IP address in the IoT range. It also ensures they receive the correct gateway and DNS settings.
Make sure your pools do not overlap with each other. Keep a clear block of addresses reserved for static assignments, such as your main servers and switches.
A structured address assignment plan prevents IP conflicts and makes your network much more reliable over time.
Implementing the Default Deny Firewall Posture
By default, once your router knows about all your virtual interfaces, it may try to route traffic between them. This defeats the purpose of logical isolation.
You must write specific firewall rules to enforce your security boundaries. The best practice is to start with a default drop rule for all interVLAN traffic.
This means that unless you explicitly write a rule to allow communication, all traffic between your virtual networks is blocked. This security strategy is incredibly robust.
Once all communication is blocked, you can selectively open necessary paths. This approach is known as the principle of least privilege.
Writing Rules for Trusted Devices
Your trusted devices, such as your personal laptop, will reside on VLAN 20. These devices need to access resources in other zones.
You should write a rule that allows traffic to initiate from VLAN 20 to your lab environment on VLAN 40. This allows you to manage your servers easily.
However, you should not allow connections to initiate the other way around. The lab environment should never be able to start a connection to your trusted laptop.
By using stateful packet inspection, your firewall will allow return traffic from the lab back to your laptop. It will still block any unsolicited incoming connections from the lab.
Isolating Smart Home and IoT Hardware
Smart home hardware is notorious for having weak security measures. Many of these devices rely on cloud servers and receive infrequent security updates.
By placing them on VLAN 30, you completely block them from scanning your local servers. They can still reach the internet to function correctly, but your personal data remains safe.
If you use a local smart home controller, you can write a specific rule. This rule should allow the controller to talk to the smart devices while keeping the rest of your network closed.
This setup prevents a compromised smart bulb from becoming a gateway to your tax documents or family photos.
Sandboxing Your Testing and Lab Environment
The testing zone is where you will deploy untrusted software, malware analysis tools, or unstable operating systems. This environment must be completely sandboxed.
You should configure firewall rules that prevent any outgoing traffic from the lab zone to your trusted networks. You can even block internet access entirely for highly sensitive testing.
This setup allows you to break things without worrying about your home network. It provides the ultimate peace of mind for curious engineers.
If a testing virtual machine gets infected with ransomware, it will remain trapped inside its own logical sandbox.
Crafting a Secure Guest Network
Friends and family members often ask for your wireless password when they visit. Giving them access to your main network exposes your lab to unknown devices.
You can create a guest network on VLAN 50 that only permits outbound web traffic. This allows visitors to browse the web while keeping your internal network invisible to them.
This setup also prevents guest devices from accidentally running software that might interfere with your lab services.
A clean guest network is a basic courtesy that also serves as a critical security layer for your home.
Managing Wireless SSID to VLAN Mapping
Modern wireless access points are incredibly powerful. They allow you to broadcast multiple wireless names from a single physical radio.
You can map each wireless name to a specific virtual network ID. This means your personal laptop connects to a secure wireless network on VLAN 20, while your smart plugs connect to an IoT wireless network on VLAN 30.
To make this work, the port connecting your access point to your switch must be configured as a trunk port. The access point will tag the wireless traffic before sending it to the switch.
This allows you to extend your logical network boundaries seamlessly into the air without needing multiple physical access points.
Troubleshooting Multicast and Discovery Protocols
Many modern devices use multicast traffic to discover each other on a local network. Examples include media casting devices and file sharing protocols.
Because virtual networks block broadcast and multicast traffic by default, these discovery features will stop working across different zones. Your phone on VLAN 20 will not see a media player on VLAN 30.
To resolve this, you can configure a multicast DNS repeater on your router. This service safely forwards discovery packets across your virtual boundaries without exposing the actual devices.
This ensures you can still cast videos and share files comfortably while keeping your security rules fully active.
Performance Considerations and Router on a Stick
Segmenting your network can introduce some routing overhead. When traffic moves between virtual networks, it must travel up to the router and back down.
This process is sometimes called a router on a stick configuration. If you transfer large files between zones, this can saturate the physical link to your router.
To avoid performance bottlenecks, keep high bandwidth devices that communicate frequently on the same logical network.
Alternatively, you can use a Layer 3 switch to handle routing at wire speed. This offloads the traffic processing from your main firewall.
Testing and Verifying Your Segregation Policies
Once everything is configured, you must verify that your security rules are working as intended. Connect a laptop to your trusted network and attempt to ping a lab server.
The ping should succeed if you have allowed this path. Next, connect the laptop to the guest network and try to ping the same lab server.
This second test should fail completely. You should also check your firewall logs to confirm that the packets are being actively blocked by your security policies.
Regular security audits of your firewall rule configuration help catch accidental exposure before it becomes an issue.
Troubleshooting Common VLAN Issues
If a device fails to connect, the most common culprit is port misconfiguration. Ensure your access ports are assigned to the correct network ID.
Another frequent issue is asymmetric routing. This occurs when traffic travels through one path but attempts to return via another, causing the firewall to drop the connection.
Always double check that your physical cables are plugged into the correct ports. A single misplaced cable can bridge two isolated networks and bypass your security rules.
Keeping a digital network diagram updated makes it much easier to spot these physical routing mistakes.
Frequently Asked Questions
Can I use VLANs with an unmanaged switch?
No, unmanaged switches do not understand virtual network tags. They will either drop the tagged packets or broadcast them to all ports, which breaks your isolation.
Do VLANs make my network slower?
Generally, no. They actually improve performance by reducing broadcast traffic. However, routing between networks can add slight overhead if your router is underpowered.
Can a device bypass VLAN isolation?
Only if your firewall rules are too permissive or if there is a physical bridging of networks. Properly configured logical separation is highly secure.
How many virtual networks should I create?
Start small with three or four zones. Overcomplicating your network layout makes troubleshooting difficult and increases the chance of configuration errors.
Conclusion
Learning how to segment home lab network with VLANs is a fundamental skill for any system administrator or networking enthusiast. It transforms a simple home setup into a professional grade infrastructure.
By investing the time to plan your layout, configure your hardware, and write solid firewall rules, you protect your digital assets.
Enjoy the security and control that comes with a professionally segmented network. Your home office lab is now much more secure, resilient, and ready for advanced testing projects.