

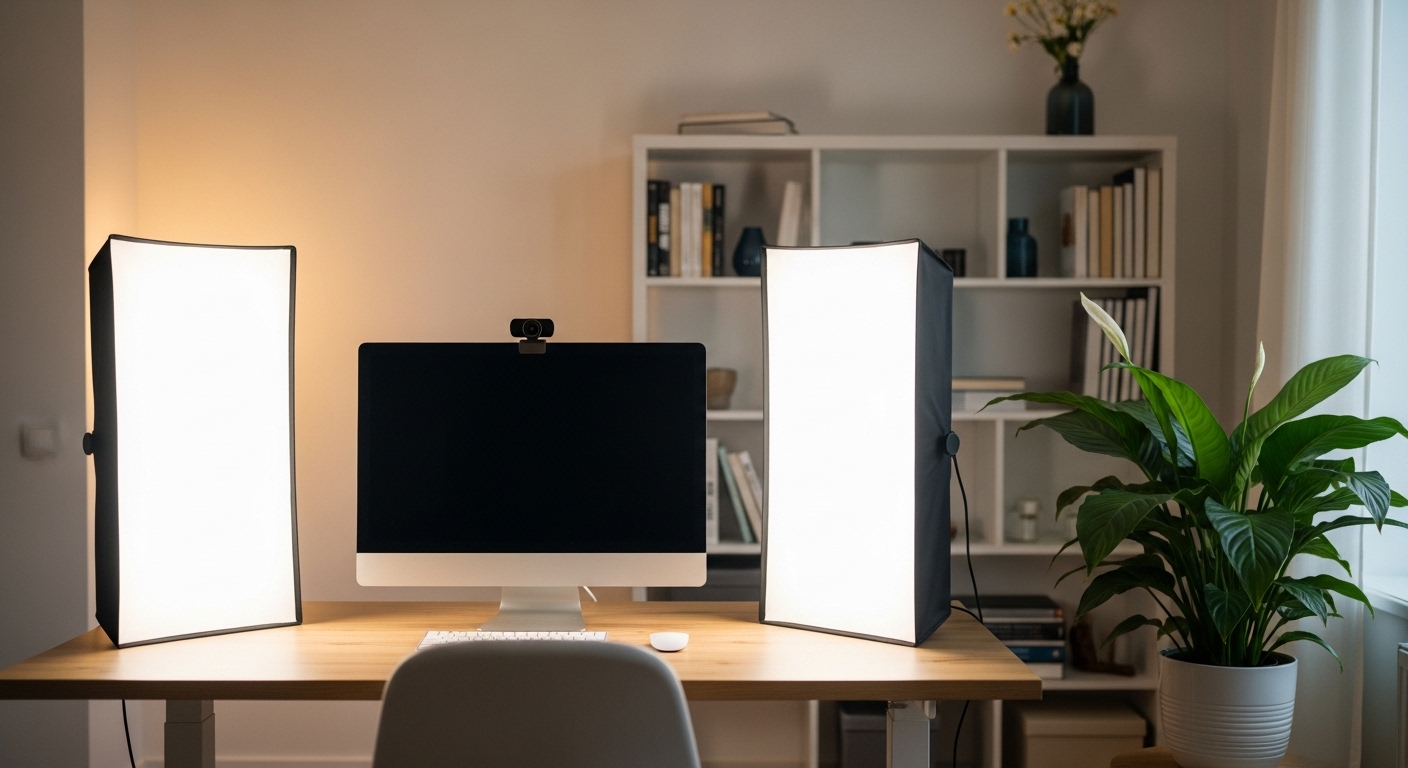
The Power of Professional Presentation
Your workspace is a launchpad for your professional career. Every video meeting is an opportunity to project competence and authority.
Many remote workers invest in high quality webcams but overlook how light interacts with the camera lens. Proper illumination can transform a cheap camera into a professional broadcasting tool.
Understanding How to Position Lights for Video Calls
Learning how to position lights for video calls is the single most effective way to upgrade your online presence. Good lighting removes distracting shadows and keeps the focus entirely on your message.
When your face is clearly illuminated, your facial expressions are easily readable. This clarity creates a sense of trust and connection with your team members.
Positioning your fixtures incorrectly can lead to harsh glares or deep shadows under your eyes. We must explore the physical properties of light to prevent these mistakes.
The Golden Rule of Diffusion
Direct exposure to a bare light source creates harsh shadows and highlights. Professional videographers always use some form of light diffusion to soften the glow.
Soft light wraps gently around your facial features instead of creating sharp lines. You can achieve this effect by using translucent panels or bouncing light off a white wall.
The Core Elements of Three Point Lighting
The standard benchmark for professional broadcasting is the three point lighting setup. This classic configuration uses three distinct light sources to create depth and dimension.
By using multiple angles, you prevent your image from looking flat or washed out. Let us break down each component of this powerful system.
The Key Light
Your primary source of illumination is called the key light. This fixture should be the brightest light in your room.
You should place this source at a forty five degree angle from your camera line. This positioning creates a natural shadow on the opposite side of your face, adding depth.
Placing this main light directly in front of you can flatten your features. The slight angle mimics the natural light of the sun.
The Fill Light
To soften the shadows created by your primary source, you need a fill light. This source sits on the opposite side of your camera.
The intensity of this source should be roughly half of the key light. It should not eliminate shadows completely, but rather soften them for a pleasing look.
If you do not have a second lamp, you can use a white reflector. Bouncing the light from your primary source back onto your face works wonderfully.
The Backlight
The final element is the backlight, which is sometimes called a rim light. This fixture is placed behind you, pointing at the back of your head.
This subtle glow separates your shoulders and hair from the background. It prevents you from blending into a dark office wall.
Ensure this fixture is hidden from the camera view to avoid distracting lens flares.
Simplified Lighting Setups for Small Workspaces
Not every home office has enough space for three large light stands. Fortunately, you can achieve excellent results with a two light setup.
Place one bright source at a forty five degree angle to illuminate your face. Position a secondary light behind your monitor to bounce soft light off the back wall.
This bounce technique creates a beautiful ambient glow without cluttering your desk. It keeps your workspace clean and productive.
The Minimalist One Light Setup
If you only have one fixture, position is absolutely critical. Place your single lamp slightly above your monitor, tilted down at your forehead.
This positioning is known as axis lighting. It provides even coverage across your face while minimizing harsh shadows beneath your nose.
Ensure the source has a diffuser to keep the glow pleasant and gentle on your eyes during long meetings.
Positioning Angles and Height Adjustments
The height of your fixtures is just as important as their physical placement. You should never position your main source below eye level.
Lighting from below creates an unnatural, spooky appearance often associated with campfire stories. It casts strange shadows upward across your face.
Ideally, your main fixtures should be slightly above your forehead level. Tilting them downward at a forty five degree angle mimics the natural sky.
Avoiding Overhead Glare
Standard ceiling fixtures are the enemy of good video call quality. Overhead lights cast dark shadows in your eye sockets, making you look tired.
Turn off your ceiling lights if they are directly above your seating position. Rely instead on desk level fixtures that you can easily control.
Working with Natural Window Light
The sun is the most powerful and beautiful light source available. However, managing natural window light requires careful planning.
You should never sit with a bright window directly behind your back. This mistake turns you into a dark silhouette, making your face invisible to others.
Instead, position your desk so the window is directly in front of you. The soft, ambient daylight will illuminate your face perfectly.
Dealing with Changing Daylight
The main challenge of using sunlight is its unpredictable nature. Clouds can suddenly block the sun, changing your exposure mid call.
To counter this, use sheer curtains to diffuse the light. You can also supplement natural light with a dimmable desk lamp to maintain consistency.
Configuring Color Temperature and Brightness
Matching the color of your fixtures to your environment is essential. This characteristic is measured in Kelvin and is called color temperature.
Warm yellow tones are cozy but can make you look orange on camera. Cool blue tones can look clinical and sterile.
Aim for a neutral white tone around five thousand Kelvin. This temperature closely mimics natural daylight and looks highly professional.
Matching Multiple Sources
Mixed color temperatures can confuse your camera sensor. If you use a warm desk lamp alongside cool daylight, your white balance will look distorted.
Try to keep all your active light sources at the same temperature. This uniformity ensures accurate skin tones and a clean image.
Solutions for People Who Wear Glasses
Reflections on your lenses can block your eyes and distract your audience. Managing glasses glare requires highly precise angles.
Do not place your key lights directly in front of your face. Instead, move them further to the sides, increasing the angle past forty five degrees.
Raise the height of your stands and tilt the lamps downward. This physical alignment causes the reflection to bounce down, missing the camera lens completely.
Using Softboxes and Diffusers
Larger light sources produce less intense reflections than small, concentrated bulbs. Utilizing a softbox increases the surface area of the light.
This change makes any unavoidable reflections much softer and less distracting. Your eyes will remain visible throughout the entire conversation.
Optimizing Your Background Lighting
Your background is a key part of your visual presentation. Adding a dedicated background light adds depth to your stream.
You can use a small lamp to illuminate a plant or a bookshelf behind you. This decorative touch makes your home office look like a professional studio.
Ensure the background brightness is lower than your face illumination. You must always remain the brightest subject in the frame.
Controlling Spill Light
Avoid letting your main face lights spill onto your back wall. This spill can wash out the background and reduce contrast.
You can prevent this by placing your desk a few feet away from the wall. This physical separation creates natural depth of field.
Adjusting for Different Skin Tones
Camera sensors react differently to various skin tones. Customizing your light intensity ensures everyone looks their best.
Lighter skin tones easily reflect light and can look washed out. You should lower the brightness of your key source to preserve facial details.
Darker skin tones absorb more light and benefit from stronger, direct illumination. Increase your fixture brightness and focus on soft, reflective sources to highlight facial contours.
Fine Tuning Camera Exposure
Your camera automatic settings might struggle with high contrast environments. Manual adjustments are often necessary to achieve perfect exposure.
Use your camera software to lock the exposure level once you have positioned your physical lights. This step prevents distracting brightness shifts during your meeting.
Choosing and Utilizing Diffuser Materials
Understanding diffusion is critical for achieving a clean look. Raw bulbs emit light in harsh, concentrated directions that create ugly hot spots on your forehead.
A diffuser spreads these photons out, creating a larger and softer source of illumination. Let us look at how you can soften your light with standard household items.
The Power of Bouncing Light
If you do not have a physical diffuser, you can use a technique called bouncing light. Simply turn your adjustable lamp toward a flat white wall or ceiling.
The light reflecting off the neutral surface will scatter evenly across your entire workspace. This method costs absolutely nothing and creates incredibly flattering results.
Using Translucent Materials
Another option is placing a semi transparent material between the bulb and your face. A white shower curtain or specialized drafting paper can serve this purpose.
Ensure these materials do not directly touch hot bulbs to prevent any safety hazards. LED panels are ideal for this because they run cool.
The Hazards of Extreme Backlighting
Many remote workers mistakenly choose a desk position based on view rather than light. Sitting with a large glass window behind you is a major obstacle.
This layout causes a massive contrast issue for standard digital webcams. The camera adjusts its exposure for the bright outdoor sky, leaving your face in complete darkness.
Fixing the Silhouette Effect
To fix this issue, you must use heavy blackout curtains during daytime meetings. This allows you to regain complete control of your workspace atmosphere.
Alternatively, you can reposition your desk so you face the window directly. This change leverages the natural sun as a massive, free softbox.
Webcam Software Configurations and Light Interaction
Physical positioning is only half the battle when setting up your workspace. Your digital camera software settings must coordinate with your physical fixtures.
Most cameras ship with automatic exposure algorithms that constantly adjust settings during calls. These algorithms can be easily fooled by moving shadows or bright shirts.
Taking Manual Control
Download the control software provided by your webcam manufacturer. Locate the toggle switch to disable automatic white balance and exposure controls.
Manually adjust the temperature slider until your skin looks natural and accurate. Lock this setting so your video remains stable and professional throughout the day.
Desk Placement Strategies within Your Room Layout
Before buying any new hardware, analyze the architectural layout of your room. The physical position of your desk dictates your lighting opportunities.
Avoid placing your monitor directly against a highly saturated or brightly colored wall. These colors can reflect back onto your face, creating odd color casts.
Creating Depth Behind Your Chair
Position your desk to allow at least three feet of empty space behind your chair. This distance creates a pleasing depth of field that makes you look more prominent.
It also gives your ambient background lights room to spread without spilling onto your hair and shoulders.
Maintaining Your Setup for Daily Consistency
Once you find the perfect layout, you must ensure it remains consistent over time. It is easy to accidentally bump stands or shift desk items.
Mark the positions of your light stands with small pieces of masking tape on the floor. This quick visual guide helps you reset your space in seconds.
Routine Cleaning for Maximum Clarity
Dust and fingerprint oils can accumulate on your fixtures and camera lenses. Clean your LED panels and camera lens with a microfiber cloth once a week.
This simple task preserves the clarity of your stream and prevents a soft, hazy appearance on camera.
Practical Setup Checklist for Daily Meetings
Before launching your next call, take a few seconds to verify your setup. A quick routine check prevents embarrassing visual issues.
- Ensure your camera lens is clean and free of dust.
- Position your primary key light at a forty five degree angle.
- Adjust the height of your fixtures to sit slightly above eye level.
- Close any background blinds to prevent heavy backlighting.
- Set your color temperature to match the ambient room conditions.
This simple routine guarantees a flawless image every single time. It takes less than two minutes to execute once your fixtures are in place.
Comparing Common Light Configurations
Choosing the right physical layout depends on your desk size and daily needs. Let us compare the most popular choices.
The single light setup is quick and highly portable. However, it can leave one side of your face in deep shadow if not perfectly centered.
The dual light setup offers excellent balance and flexibility. It is the ideal choice for most professional home offices in 2026.
The classic three point system provides the ultimate broadcast quality. It requires more physical space but delivers unmatched depth and clarity.
Frequently Asked Questions
Should I buy a ring light or a key light?
A ring light is excellent for close setups and limited desk space. However, a dedicated panel light with a soft diffuser offers more control and softer coverage.
Why do my eyes look tired on camera?
This look is usually caused by overhead ceiling lights casting downward shadows. Position a light source directly in front of you at eye level to fill those dark areas.
How do I stop my webcam from auto adjusting brightness?
Most webcams allow you to disable auto exposure in their software settings. Locking this setting ensures consistent quality regardless of shifts in your physical environment.
Can I use a normal desk lamp for video calls?
Yes, you can use a standard desk lamp if you diffuse the light. Simply point the lamp at a nearby wall to bounce a soft glow onto your face.
Summary of Video Call Lighting Best Practices
Achieving a professional look does not require expensive television studio equipment. By mastering light angles and diffusion, you can drastically improve your image.
Always prioritize placing your key light slightly above eye level. Soften the glare, match your color temperatures, and control your background exposure for the best results.
With these adjustments, your home office will look incredibly professional. Your audience will focus on your words instead of poor video quality.